2. Mosaic Tile and Metal Medallions: Product Info and Installation
|
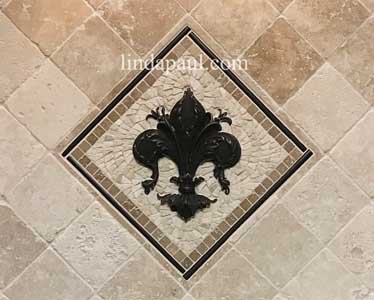
Tile medallions can be used indoor or outdoors. They are amazing quality and created by hand by mosaic artisans.
It is recommended that you use a professional tile installer who has installed mosaics.
Our mosaic tile medallions and liners come mounted on a mesh. Install medallions using a high-grade thin-set mortar such as Custom EBMLite™ Epoxy Bonding Mortar. If not using mortar, construction adhesive such as SikaBond® may be used.
The marble or travertine stones of the medallion are hand cut to fit around the metal accents. The stones and the metal accents of the medallion are all mounted on a mesh backed sheet and arrive as one piece that you glue to the wall and grout. Medallions and any mesh backed mosaics must be grouted. They depend on the application of grout for their strength and resistance to the elements. You can use sanded or unsanded grout. (Do not use acrylic or stainproof grouts)
|
|
Mask off tile to eliminate grout on all relief pieces and avoid scratching the finish. Using a small brush and water only, remove excess grout from tile before it dries. Towel dry to avoid water spots. All grout must be removed from the surface before it dries to eliminate damaging the finish. Start with a small area and get it perfect before moving on to another area. Make sure all grout is cleaned off of the area you are working on before moving on. Non-abrasive GOJO® hand cleaner may be applied lightly before grouting as a grout release and to remove grout haze on all surfaces after grout dries. Make sure you wipe off all excess grout and do not allow grout to dry on mosaic surface or the metal accents.
You can use a soft toothbrush to remove wet grout from the crevices of metal pieces
Grouting Tip from Linda Paul : You can use a cake icing bag or a disposable squeeze bottle to create a thin filling of grout between the stones. Smooth out the grout with your finger or small piece of wet sponge. Make sure you wipe off all excess grout and do not allow grout to dry on mosaic surface or metal accents. It is recommended to start with a small area and get it perfect before moving on. Do not spread grout over the medallion with a float.
Set backs from Heat: All High relief metal coated tile accents installed above a cook top, outdoor kitchen or fireplace must be set 5 to 6 inches above and 3 to 4 inches back from heat source and have a minimum 2 inch set back from the profile (face of the tile).Failure to do so may result in damage and will void the warranty.
Mosaics should be kept flat in an enclosed box in a cool dry place until installation begins. Never expose mesh-backed mosaics to moisture or temperatures above 95 degrees. To move or transport a mosaic, leave plastic sheet on back and carefully place on a piece of plywood or other solid surface. Always remove plastic sheet before installation.
Mosaic medallions up to 48" are usually shipped as one piece. Larger medallions may be shipped in multiple pieces. Mosaic decos, connectors and liners should only be picked up one piece at a time. Pick mosaics up with two hands at top or sides placing hands near corners or at corners of one side of the piece. In some cases, this operation may require two or more people. Lift mosaic straight up and place the opposite end of the mosaic in the mortar first. Always take care to align piece in exact location so as not to require adjustment later. Then proceed with mosaic stone installation techniques.
You will receive installation and care instructions with the products that you purchase
A sealer is recommended for the stones after installation. A sealer/enhancer really brings out the color of the stones
3. Installation of Decorative Metal Accents and
Glass Tile Onlays
Decorative onlays may be mounted over an existing substrate. Adhere to stone, glass and ceramic using a quickset 2-part epoxy and seal around edges with a clear bead of silicone. Pieces may also be adhered to metal or wood and can be used for exterior application or around a heat source (see warning) using the appropriate adhesive or wood bond such as SikaBond® Construction Adhesive.
Warning: Onlays installed above a cook top, outdoor kitchen or fireplace must be set 5 to 6 inches above and 3 to 4 inches back from heat source>
keep a minimum 2 inch set back the edges of hot pots and
pans. Failure to do so may result in damage and will void the warranty. Note : If using an adhesive allow to off-gas (5-7 days) first, then run a clear bead of silicone around outside edges to keep moisture out. Failure to do so may cause piece to delaminate from substrate.
Materials needed for installing decorative onlays on top of tile using epoxy glue:
Rubber Gloves
wooden coffee stir sticks
2 part 5 minute quick set epoxy such as Loctite
disposable container for mixing the epoxy glue
clear silicone sealant
Important: Try a test first to see how the glue that you purchased adheres to your particular surface
1. Plan out exactly where the onlay will be applied to the tile or other surface
2. Make sure both surfaces are clean and dry.
3. Wear rubber gloves and squeeze out the 2 part gel epoxy into a disposable container. Make sure to mix the 2 part together very well. I like to use wooden coffee stir sticks for this.
4. When possible apply the mixed epoxy to both surfaces. For some of the intricate decorative onlays , this may not be possible. Apply a generous amount to the back of the onlay (but not so much that it oozes out the sides) and press it against the surface you are glueing to. Hold each piece for at least 10 minutes without moving it. Even though it says 5 minute epoxy, it takes 10 minutes to hold and a full 24 hours to set. Remove any excess glue that squeezes out the side with a coffee stir stick. (check what color your epoxy will dry to to make sure it is a good match for your application surface.
Tip: use one bead of Simplemat at the top of the accent to prevent it from slipping while is sets
After 5 to 7 days, runs a bead of silicone around the outside edges to keep out moisture.
Tip: its much easier to glue an tile accent piece on a horizontal surface, than a vertical one. so if you are glueing the accents onto a sheet of mosaic to, try to do this on a flat table top, then adhere the whole piece to the wall.
4. How
to frame a Ceramic Tile Mural
Ceramic tile murals looks best
when framed with a border material. A border creates a
transition zone between the mural and the rest of your tile.
You can frame it with either a stone or ceramic border that
matches the rest of the tiles you are using, or you can buy
some of our metal tile borders. Here are some examples
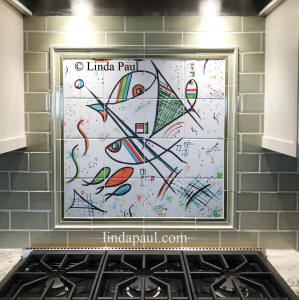 |
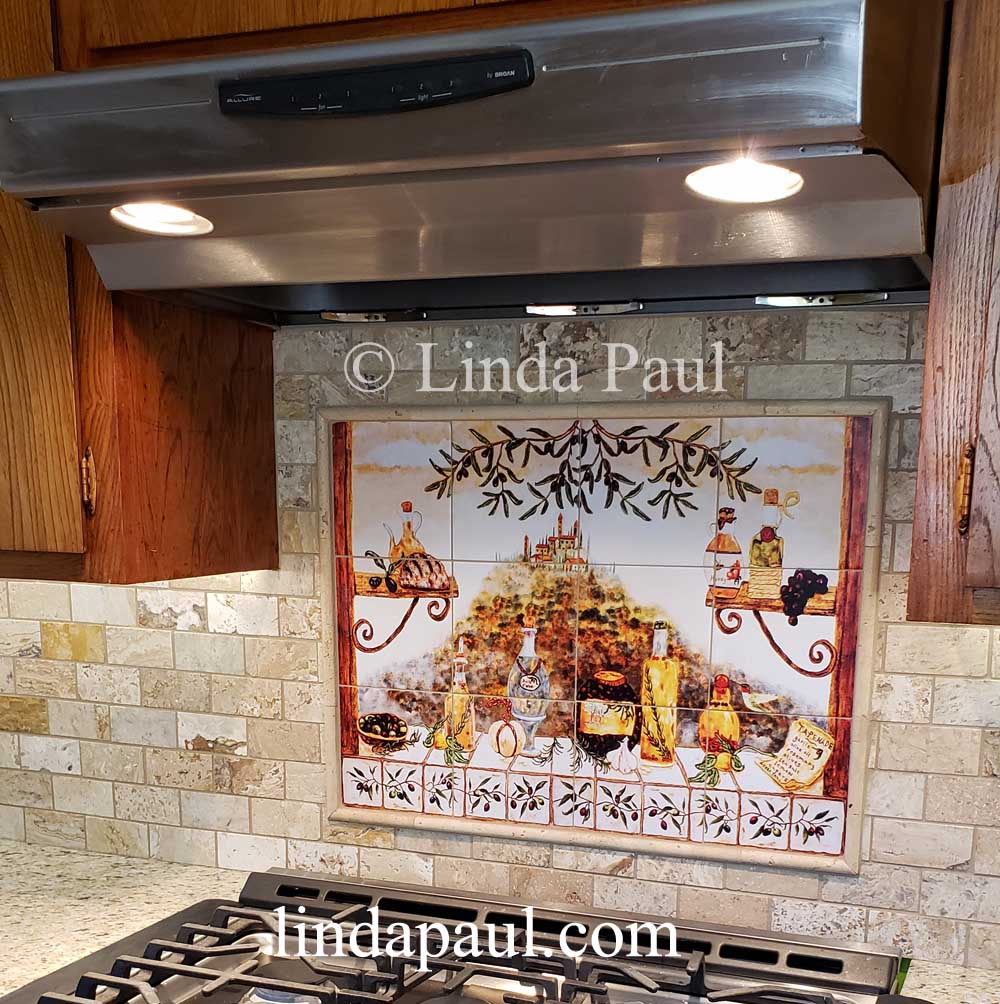
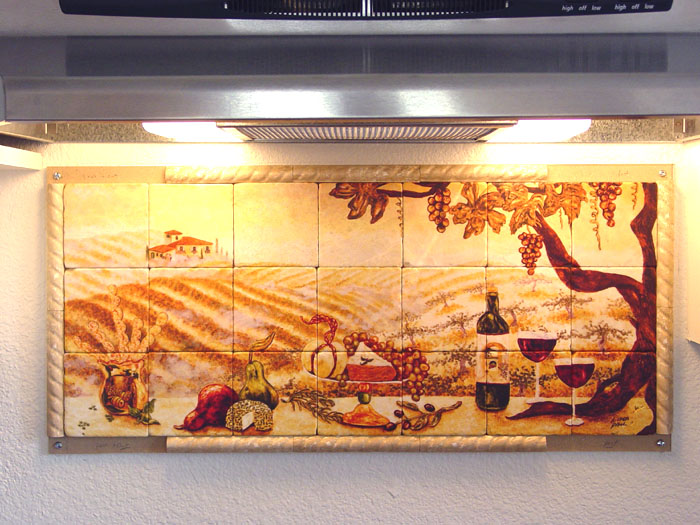
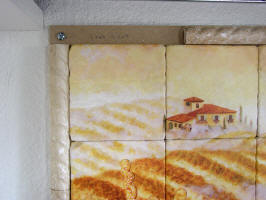
| Example of how to frame a ceramic tile mural. Border is matched to tile in
the rest of the backsplash for a fabulous effect around
Fishing with Picasso tile mural |
|
5. Installing removable ready to hang tile murals and backsplashes
Here is a super easy backsplash idea. You can install our tile murals as a removable backsplash.
This is easy to do and you don't have to use grout! You can take your beautiful mural with you when you move.
The murals below were installed as a removable backsplashes 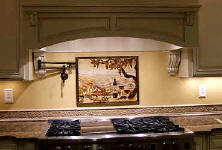 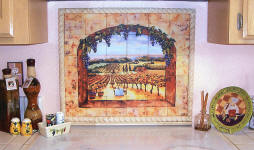
Materials Needed:
- A 3/8" mdf board cut to the size of your mural
and border
- 10 minute , 2 part epoxy
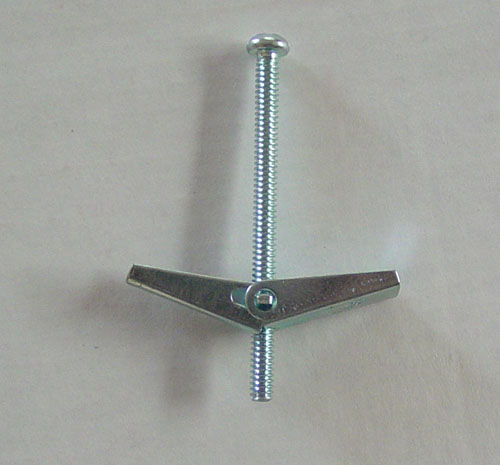
- 4 butterfly wall anchors
- drill
1. Plan your space:
Once you have all of your tiles, lay them out and measure the exact width and height. Using framing tile is recommended as it hides the installation wall anchors so the mural can be removed at a later date. You will need to countersink the screws into the board unless you buy the framing tiles that have a hollow underside, these will hide the screws that hold the mural to the wall.
2. Cut your Board
Cut a 3/8" mdf board (available at Home Depot or Lowe's) to the exact size of the mural and surrounding framing tile. Make sure your board is flat.
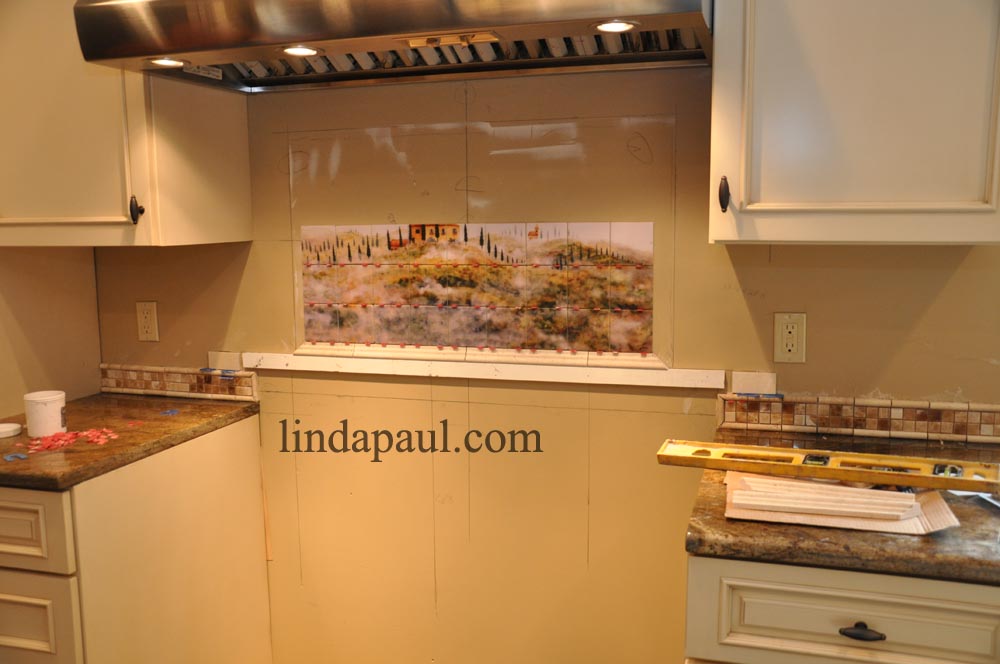
Once the board is cut, hold it up on the wall where you want you mural to be and draw a line around it on the wall
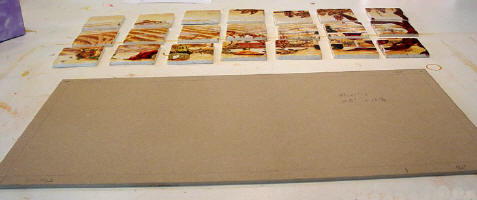
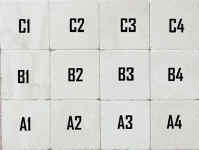
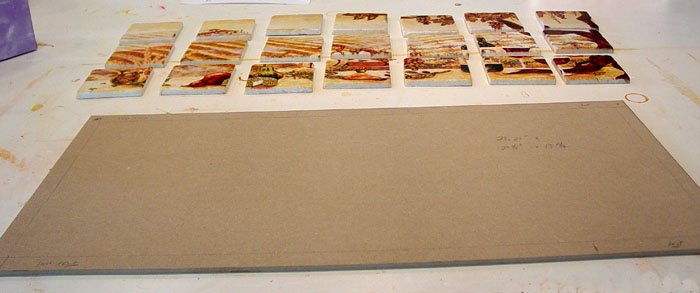
3. Line up the tiles
On a flat surface, place the mural tiles and framing tiles on the board and line everything up. Remove the framing tiles and draw a line around just the mural. Then mark where the edge of each framing tile is on the board.
Drill a hole in each of the four corners large enough to accommodate the butterfly wall anchors (3/8" to 1/2")
 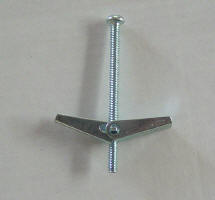
mural laid out on board butterfly anchor
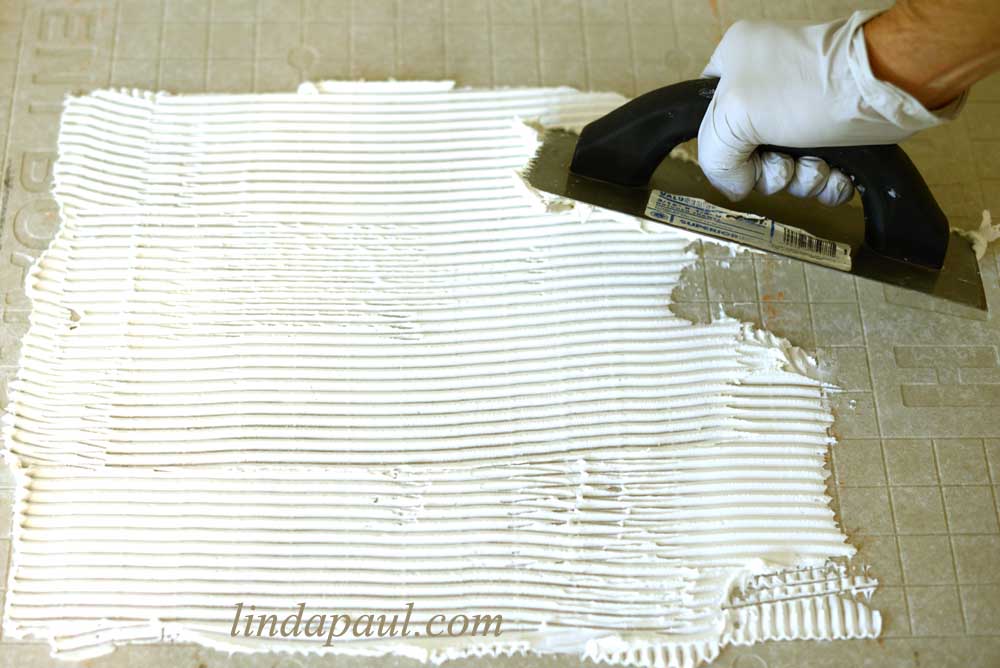
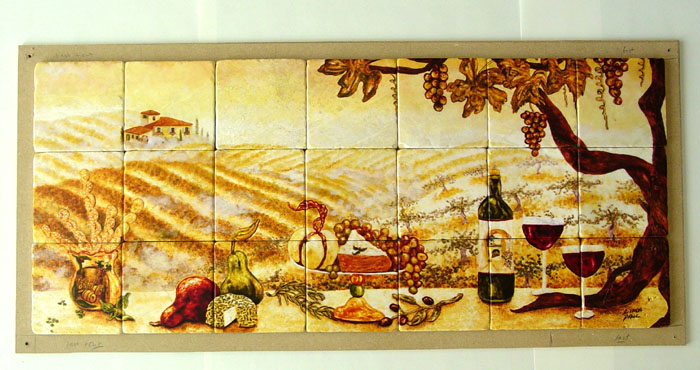
4. Gluing the tiles onto the board
Using 5 or 10 minute epoxy,
glue the mural tiles onto the board and let dry.
Next, you will glue on the framing tiles leaving off the four corner framing tiles
(an is the step 5 picture) so that you can attach the board to the wall. Let dry overnight.
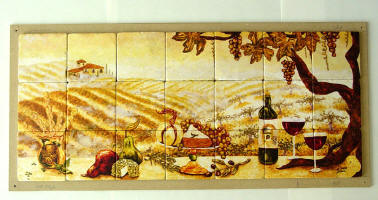
5. Attaching the board to the wall
You will need two people for this step. Holding the board up the the wall , mark the drill hole locations for the 4 anchors on the wall. Drill four holes and make sure they are large enough to accommodate the anchors. Holding the board in place screw the board to the wall using the butterfly anchors. Note: these murals are heavy, do use any other kind of anchor unless you are placing screws directly into a wall stud.
mural mounted on wall corner before last tile is glued on
6. Glue the four corner tiles
Finally, you will glue on the four corner framing tiles. Use a very small amount of the glue so that these tiles can be popped off at a later date and the mural relocated. Its a good idea to buy extra framing tiles in case you break one.
see pictures of Installed Kitchen backsplashes and ceramic tile murals
|